
Imagine sinking your teeth into a soft, chewy white chocolate brownie that melts in your mouth, leaving a rich, velvety experience that lasts long after the last crumb is gone.
Are you ready to take your brownies to a whole new level of richness and indulgence? Say goodbye to ordinary chocolate brownies and prepare to go on a delicious voyage into the world of white chocolate brownies. With their creamy, buttery flavor and irresistible sweetness, these scrumptious delights combine velvety white chocolate and the chewy goodness of conventional brownies in a delicious fusion.
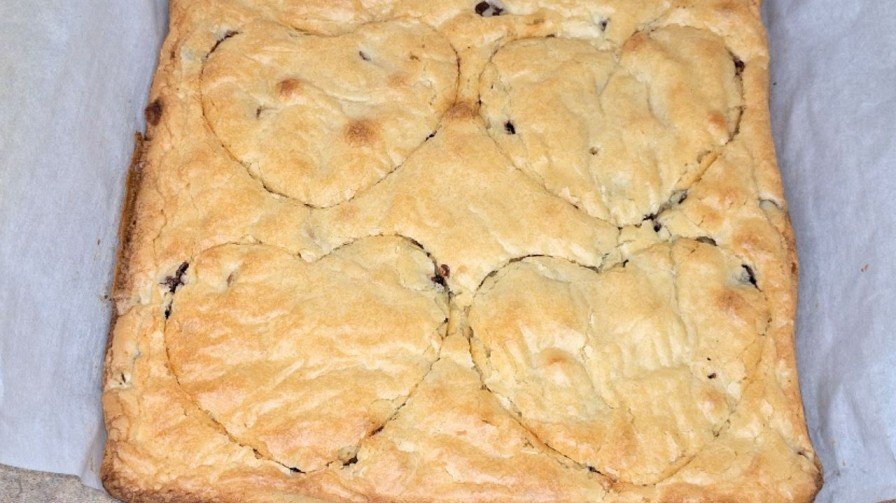
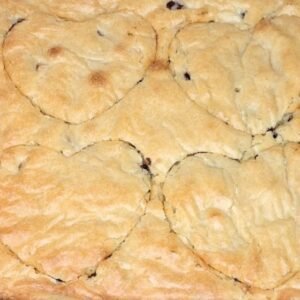
As the image suggests, this recipe is a perfect valentine’s day dessert. But why stop there? Treat yourself to this sweet goodness for any occasion or just a casual day lounging at home.
INGREDIENTS NEEDED FOR WHITE CHOCOLATE BROWNIE
BROWNIE
1. White Chocolate Bars – I used Baker’s brand.
3. Oil
4. Salt
5. Eggs
6. White Sugar
7. Vanilla
8. Melted Butter
9. Flour
WHIPPED CREAM
1. Heavy Cream
2. White Sugar
CHOCOLATE DRIZZLE
1. Dark Chocolates Bar – I used Baker’s brand.
HOW TO MAKE WHITE CHOCOLATE BROWNIE
1. Add your sugar and room temp eggs to a mixing bowl. Using a hand mixer, beat on low speed.
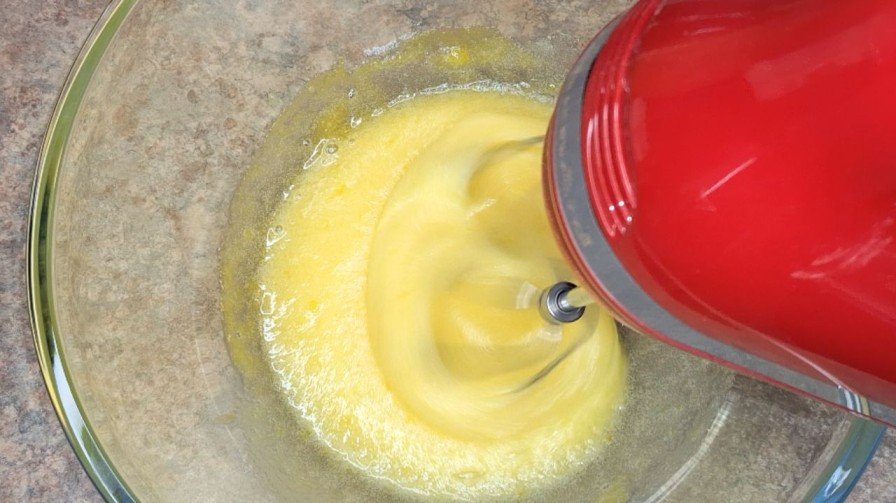
Gradually increase the speed until the mixture is pale and fluffy. This will take approximately 5 minutes.
2. Microwave the butter and white chocolate for 1 to 2 minutes, in 20 sec intervals until melted. Mix to combine and then set aside to cool.
3. To your egg mixture, add in the vanilla, oil and cooled butter and white chocolate. Beat until fully incorporated.
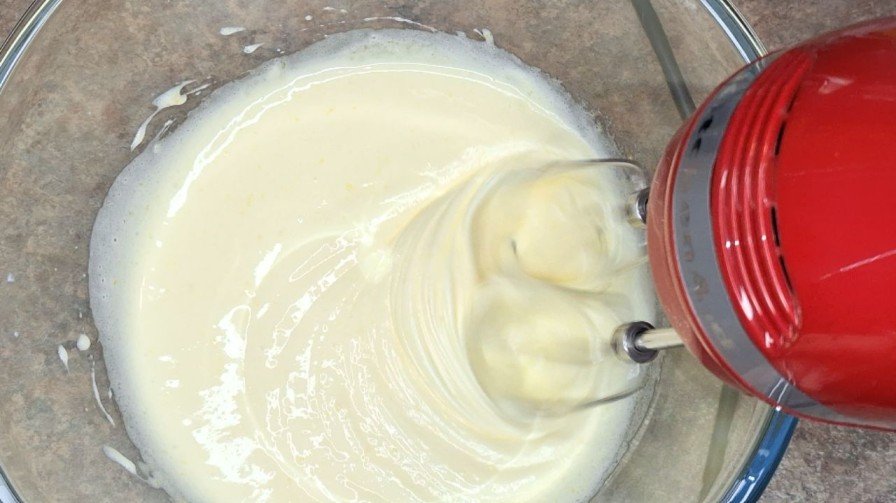
4. Sift in your flour and salt and fold to combine.
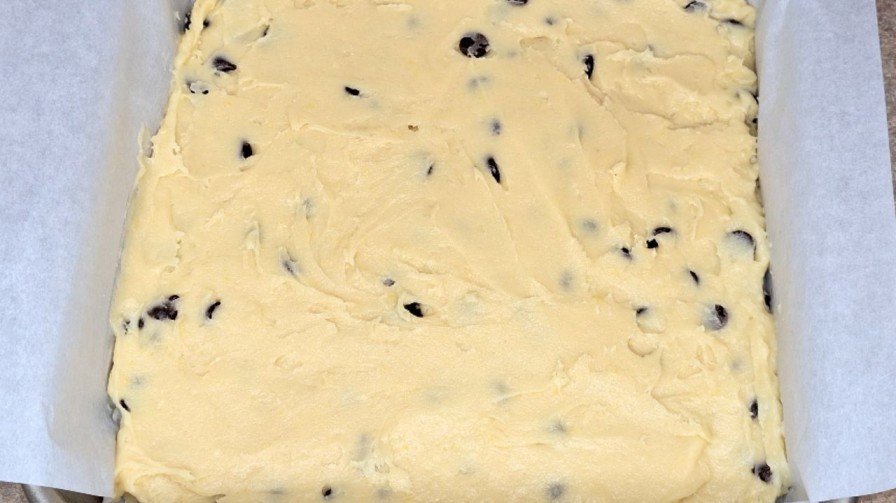
5. Fold in your chocolate chips until fully combined.
6. Grease and line a 9″ x 9″ square baking pan and pour in the batter. Evenly spread out the batter and then tap the pan on your surface to remove any large air bubbles.
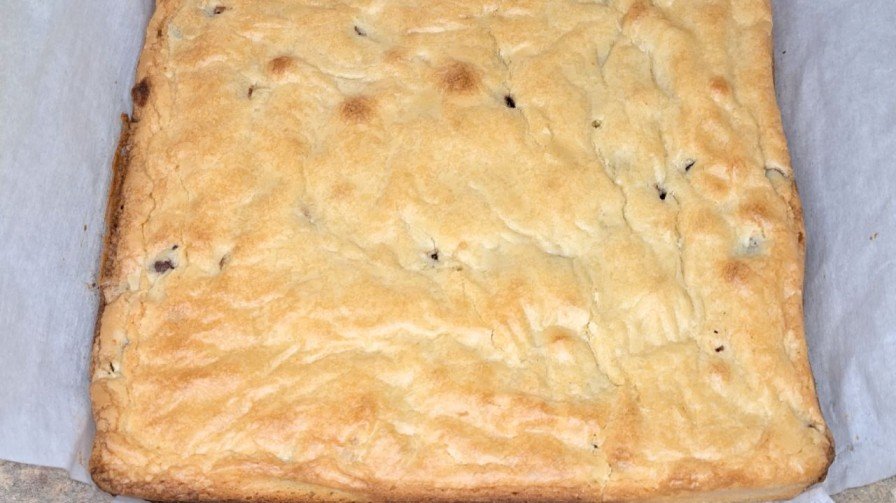
7. Bake at 350°F for 25 mins. Let cool in the pan for at least 10 minutes.
8. Add your chocolate bar to a bowl and microwave it for approximately 1 min in 20 secs interval until melted. Briefly cool it before adding it to a Ziploc or piping bag. Make a small snip at the end of the bag and drizzle on a plate in your desired design. You can also use a squeeze bottle if you have that at your disposal.
9. Add your cold heavy cream and sugar to a clean bowl and beat on low. Gradually increase the speed until it reaches stiff peaks. This will take approximately 5 minutes. Add the whipped cream to a piping bag with a star tip. Pipe the whipped cream on the plate or the brownie if you so preferred.
10. Use a heart shaped cutter or a knife to cut your brownie into squares.
11. Place the brownie on the plate and use an ice cream scoop to serve a scoop of ice cream on the side garnished with a mint leaf.

HOW TO STORE IT
The brownies on its own will keep at room temperature for up to 7 days. You can store the melted and cooled chocolate at room temperature for up to a month, if you decide to keep it that long. Whipped cream will last for up to 5 days in the fridge.
DID YOU MAKE THIS RECIPE?
Loved this recipe? Like, share, and comment so that more people can see it. Your email will not be displayed.
WHITE CHOCOLATE BROWNIE – MOXIES COPYCAT RECIPE
Ingredients
BROWNIE
- 6 oz White Chocolate Bars 170g
- ½ cup Semi-Sweet Chocolate Chips 120g
- 1 tsp Oil 5ml
- ½ tsp Salt
- 2 Large Room Temp Eggs
- ¾ cup White Sugar 120g
- 1 tbsp Vanilla 15ml
- ½ cup Melted Butter 113g
- 1 ½ cup Flour 188g
WHIPPED CREAM
- ½ cup Heavy Cream cold, 120ml
- 1 – 1 ½ tbsp White Sugar 15g -22g
CHOCOLATE DRIZZLE
- 4 Dark Chocolate Squares 1oz
Instructions
- Add your sugar and room temp eggs to a mixing bowl. Using a hand mixer, beat on low speed. Gradually increase the speed until the mixture is pale and fluffy. This will take approximately 5 minutes.
- Microwave the butter and white chocolate for 1 to 2 minutes, in 20 sec intervals until melted. Mix to combine and then set aside to cool.
- To your egg mixture, add in the vanilla, oil and cooled butter and white chocolate. Beat until fully incorporated.
- Sift in your flour and salt and fold to combine.
- Fold in your chocolate chips until fully combined.
- Grease and line a 9" x 9" square baking pan and pour in the batter. Evenly spread out the batter and then tap the pan on your surface to remove any large air bubbles.
- Bake at 350°F for 25 mins. Let cool in the pan for at least 10 minutes.
- Add your chocolate bar to a bowl and microwave it for approximately 1 min in 20secs interval until melted. Briefly cool it before adding it to a Ziploc or piping bag. Make a small snip at the end of the bag and drizzle on a plate in your desired design. You can also use a squeeze bottle if you have that at your disposal.
- Add your cold heavy cream and sugar to a clean bowl and beat on low. Gradually increase the speed until it reaches stiff peaks. This will take approximately 5 minutes. Add the whipped cream to a piping bag with a star tip. Pipe the whipped cream on the plate or to the brownie if you so preferred.
- Use a heart shaped cutter or a knife to cut your brownie into squares.
- Place the brownie on the plate and use an ice cream scoop to serve a scoop of ice cream on the side garnished with a mint leaf.
Video

